Virtualization is incredibly useful. Among other things, the ability to create virtual machines allows one to consolidate hardware, create more resilient networks and play around in lab environments without investing in expensive hardware. I’ll show you how to create a basic virtual machine.
I’m using Windows 10 Professional, but the steps are pretty much the same in all versions of Windows that have Hyper-V.
First, you need to make sure Hyper-V is installed on your computer. Once that’s done, launch your Hyper-V manager.
Creating a Virtual Machine
In Hyper-V Manager, select “New” under the “Actions” pane in the right side of the Hyper-V Manager window:

When the wizard launches, just click next:

I’m creating a virtual router for a test environment, so I’ll be installing Ubuntu Linux. It doesn’t require a lot of resources, which is nice. You’ll want to make sure you set up a virtual machine that has the settings you need.
For the “Specify Name and Location” window, give the VM a name and then decide where you want to store it. Then, click “Next”:

You’ll need to choose what generation machine you’ll create. If you’re migrating a VM from a previous version of Hyper-V, if you’re installing a 32-bit OS or you’re creating a non-Windows VM, you’ll want to create a Generation 1 machine. Otherwise, go with Generation 2. I’m installing Linux, so Gen 1 it is!
In the “Specify Generation” window, select the appropriate generation and click “Next”:

When it comes to memory and drive space, make sure you configure settings that are adequate for the intended purpose of the virtual machine. For my little router, I don’t need much, so 2GB is fine. Regardless, I recommend using dynamic memory… it keeps things efficient by only allocating physical memory when necessary.
In the “Assign Memory” window, enter the appropriate amount of memory and ensure the “Use Dynamic Memory for this virtual machine” box is checked and then click “Next”:

When it comes to networking, you need to select a virtual switch to use for connectivity. Or, you can simply decide to not use anything. I need connectivity, so I’m selecting a virtual switch.
In the “Configure Networking” window, select the desired connection and then click “Next”:

In the “Connect Virtual Hard Disk” window, give your VHD a name, browse to where you want it stored, and give it a size appropriate to its use. Once you’re satisfied, click “Next”:

You can choose several ways to install your OS. It doesn’t really matter at this point; you can always mount media later. I’ve got the ISO downloaded and ready to go, so I’m going to go ahead and mount it now. This doesn’t actually install the OS; it simply mounts the media and the next time you launch the VM, it will boot to that media.
In the “Installation Options” window, select the appropriate option and configure it. Once you’re done, click “Next”:

By the way, you’re not hallucinating. There actually is an option to install from floppy disk.
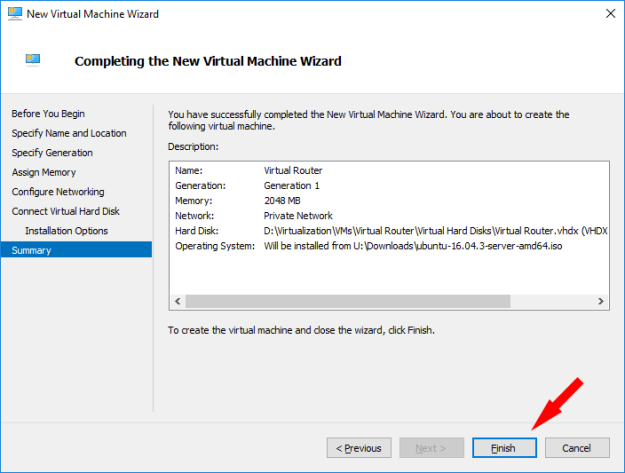
In the “Completing the New Virtual Machine Wizard” window, click “Finish”:
That’s it! Now you can connect to the VM, install the OS and have just a whale of a time.
Hope you find this useful!
